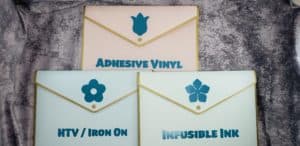
How to Cut and Apply Heat Treat Vinyl
OK, so you just bought your cutting machine and keep wondering to yourself, “Now what?” What can I make? How do I get started? What materials do I use? What’s weeding? Have no fear! I got you! Following the tutorial below will help you cut and apply heat transfer vinyl or HTV. You may also see it listed as Iron On. All of these are the same thing.
My son and his friends made tie-dye shirts over the summer. For today’s project, I’m going to take his shirt and apply some HTV to it to give it a little more pizzazz. The shirt is cute without the vinyl; however, the design takes it the next level. And the best part? It’s surprisingly simple to do. Without further ado, let’s get started.
Supplies Needed
- Heat Treat Vinyl (HTV) or Iron On Vinyl
- I used Starcraft Softflex HTV (navy)
- Weeding Tool
- Parchment Paper
- EasyPress or Heat Press
- T-shirt
Upload Your Design Into Design Space
Using a Cricut image in Design Space
- Open Design Space and Select the “New Project” or “My Projects” and “New”
- Click on “Images” on the left side of the screen
- In the search bar at the top of your screen, type in a search term and press Enter
- Once you find an image you like, click it to add it to the bottom of the screen. When finished, click on the “Insert Images” button
Uploading an svg from another source into Design Space
If you don’t find a suitable file in Design Space, you can also look online to find a design, font or bundle (collection of designs) that will work for project. Make sure the file includes an svg version since most files will contain several file formats. One of my favorite resources is https://designbundles.net/bundles. After purchasing your design, you’ll need to download the file onto your computer. This will typically be a zip file that you will need to extract. The process will vary depending on your operating system. Please note that extracting the zip file will NOT add your design to Design Space. You will need to follow the next steps to bring the images into Design Space.
- Open Design Space and Select “New Project” or “My Projects” and “New”
- Click on “Upload” on the left side of the screen
- Under Image, click “Upload Image”
- Click “Browse” and then select the .svg file that you previously downloaded to your computer by double-clicking the file name or click the file and click “Open”. Note: The file type will either be .svg OR it will be listed as a Microsoft Edge HTML Document. You can select more than one file to upload.
- Click “Upload” on the Cricut Design Space screen
- Select the image(s) you want to bring into your design and click “Insert Images”. Note: You can add more than one image at a time.
Cutting and Weeding Your Vinyl
Now that you have your design on the canvas in Design Space, you’ll want to determine what size you want it to be. It’s a good idea to create a template that you can use to visualize the size and placement on your blank. Clicking on “Templates” on the left side of the screen in Design Space will open up the template window. You can select from a variety of items…anything from shirts, cups, aprons, tote bags, and folders, to stand mixers, guitars and candles. After selecting your template, you can then adjust the template with various options depending on the blank you are using.
If you don’t want to use a premade template you can also create your own template by clicking on “Shapes” and then selecting “Square”. You would then enter the size by clicking in “H” for Height and “W” for Width. If the lock icon is locked, then you only need to change one dimension. Since it is a square, changing one dimension will change both dimensions. If you need to make the square into a rectangle, then click the lock icon to unlock it. Then you can change the two dimensions independently of each other. After adjusting the height and width, click the lock button to keep the dimensions. Select your template, right click and select Send to Back.
What is a blank? It’s the item that you are applying your vinyl to. For example, it can be a t-shirt, tumbler, sign, coaster, container, etc.
Ensure that your design is grouped together by selecting all of the design (do not select your template) and clicking “Group”. Move your design over the template and click on the lower right handle to size it to something that fits inside the template you created. Once you have the design sized correctly, you can cut the vinyl. Before cutting, check the following:
- If you have one layer click “Select All” from the menu at the top and then click Attach. Attaching the elements will keep each piece in the correct position when you cut out your design.
- If you have more than one layer, pick a layer/color to start with. On the right side of Design Space, hold SHIFT and click on each group and/or element for that color. Click on Attach (lower right corner) of Design Space. Repeat for each color.
Press “Make It” in the upper right corner of your screen. This will open up a screen with mini versions of your mats.
- The left side of the screen will show a thumbnail template of each mat by color. Whenever you are using HTV (or Iron On), you must Mirror each mat. Click each mat one at a time and press “Mirror” for each one. (Note: You must mirror each one individually. It doesn’t automatically mirror all the mats when you mirror the first one.) Click “Continue”.
- Set Base Material – If you don’t see your material, click on “Browse All Materials”. Use the “All Categories” down arrow, select the material you’re cutting and click “Done”. Many sites have cut settings for their vinyl.
- Put your vinyl on the mat (shiny side facing DOWN) and load the mat onto your Cricut cutting machine by pressing the flashing Up/Down arrow button.
- Once the mat is loaded, press the flashing Cricut “C” to start cutting.
- After your Cricut finishes cutting the material, you can press the flashing Up/Down arrow to unload the mat from the machine. After the last layer, press “Finish” to complete the cutting job.
- To remove the vinyl from your mat, put the vinyl face down on a flat surface and pull the mat away from the vinyl (instead of pulling the vinyl from the mat). Pulling the mat away from the vinyl, usually keeps your vinyl from curling too much.
- Weeding – You can take your weeding tool and use it to pull the excess vinyl off the carrier sheet (the shiny side) or the liner. You only want the vinyl that is going to be applied to your blank to remain.
- If you have more layers to cut, repeat steps 2-7 for each layer.
What is weeding? It’s the process of removing the vinyl that is NOT part of your design. You will typically use a special weeding tool in order to pull up the vinyl that needs to be removed. The weeding tool has a pointed or pin-like tip.
Applying Heat Treat Vinyl
Now that you have your freshly weeded design, it’s time to apply the vinyl to your shirt (or other blank).
- Preheat your heat press or Easy Press 2 to the recommended temperature and time.
- You can refer to the material’s documentation regarding heat and time settings or you can use Cricut’s heat guide or go to another site to find the their temperature settings. (I used 143 Vinyl’s guide.)
- Using your Easy Press mat or a folded up towel, lay your garment neatly on top of the mat.
- Once the heat press or Easy Press comes to the correct temperature, press your garment for 5-10 seconds to remove any moisture in the garment.
- Place your HTV (liner or shiny side up).
- Cover with a sheet of parchment paper or a teflon sheet.
- Press the garment without moving your Easy Press using the time and pressure notated on your guides or documentation. Since I was using Starcraft Softflex, I used Medium to Firm pressure for 8-10 seconds.
- Remove the parchment paper.
- Refer to your documentation to see what type of “peel” you need. If your documentation specifies a
- hot peel, remove the liner (shiny sheet) immediately,
- warm peel, let it cool down slightly, but where it’s still warm to the touch before removing the liner,
- cold peel, let it cool down completely before removing the liner.
- NOTE: If the vinyl sticks to the liner as you try to peel it from the liner, place the liner and design back down, cover with parchment paper and apply heat again using the same time, temperature and pressure settings as before.
- You’ll know the vinyl is pressed enough once you can see the fibers of the fabric in the vinyl.
- Once the liner can be safely removed from the vinyl, cover your design with parchment paper or a teflon cover sheet and press for another 5-10 seconds.
- Do not wash the garment for at least 24 hours.
- Care instructions: Always wash and dry inside out, cold water and low dryer temperature.
Summary
When I first got my Cricut, I waited for MONTHS to create my first project with HTV. It just seemed so permanent (why yes, Vicki. That’s the point!) What if it doesn’t stick? What if I burn the design? One day I just bit bullet and did it. After that, I realized that applying HTV or Iron On Vinyl doesn’t have to be intimidating or scary. It can literally be as easy as 1 – 2- 3:
- Upload your image into Design Space
- Cut and weed your vinyl
- Apply HTV
I hope that by following my tutorial, you can easily get through any initial hesitation you have and realize just how easy and fun it is to apply HTV. Learning the basics of applying a single color is a great starter project. If you’re concerned about ruining materials, pull out an old t-shirt that you wouldn’t mind practicing on. When I was trying something new, I picked a shirt that didn’t really matter if I was successful or not. If I ruined it, throwing it away would be no big deal. (Or you can keep practicing on it in different spots!)
Once you get used to applying a single layer of HTV, the next step will be layering vinyl which I’ll cover in a future article. I hope you enjoyed learning how to apply HTV. Feel free to leave questions or comments in the Comments section. Happy crafting!!