Making a Halloween Shirt with HTV
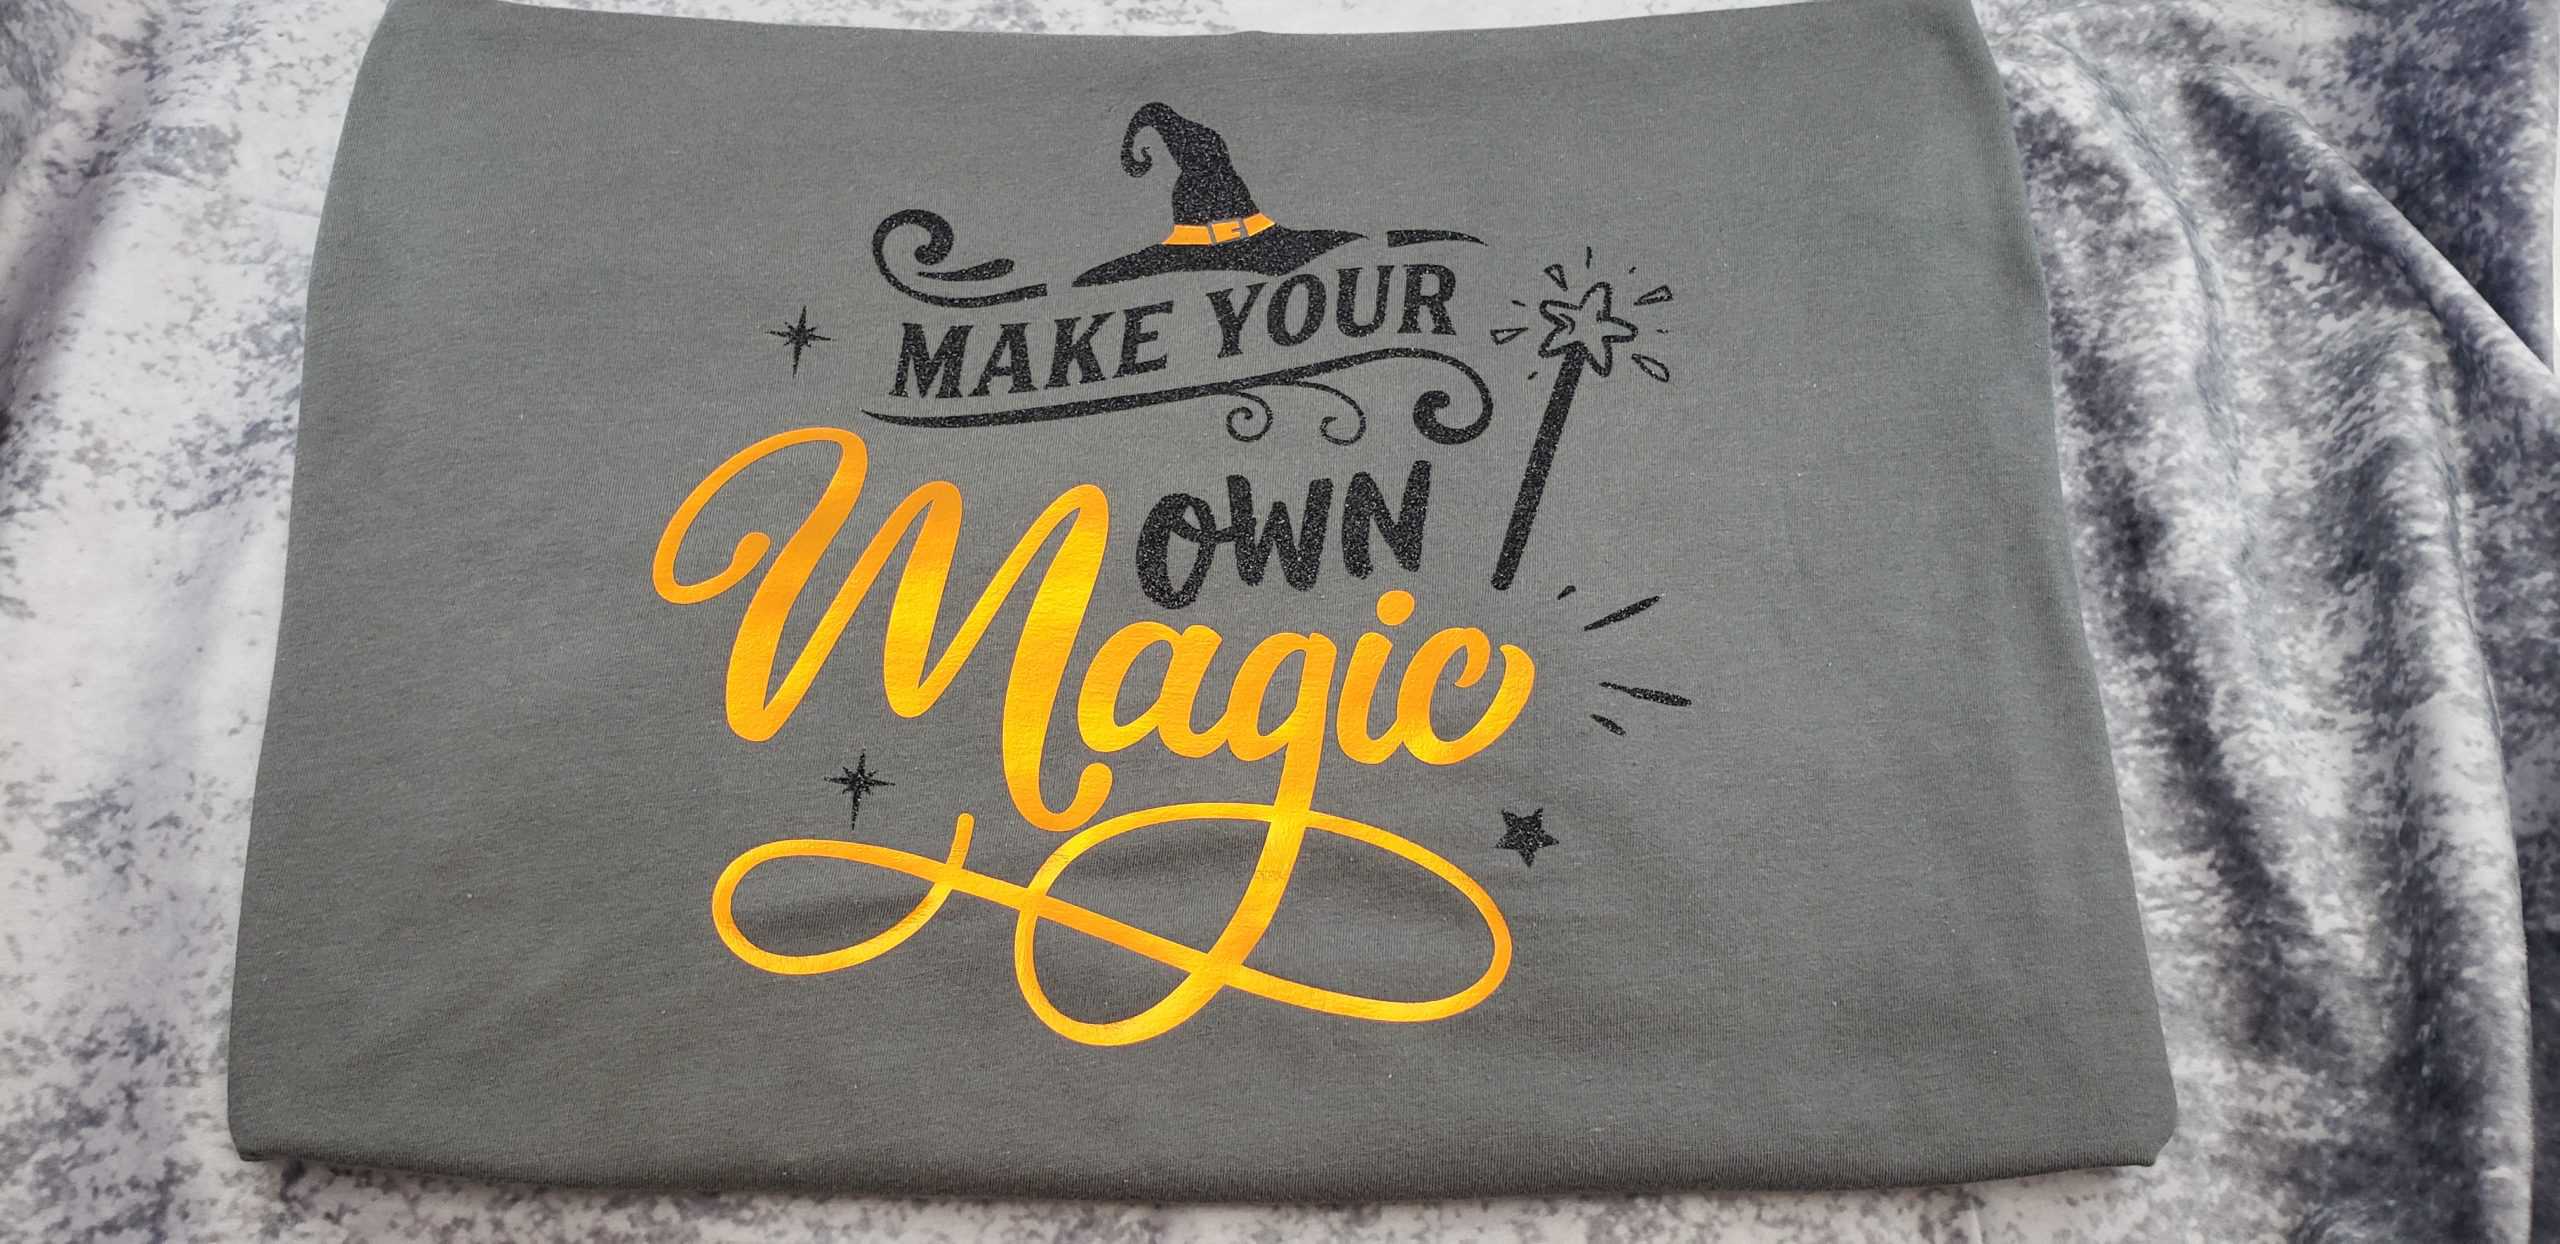
I live in the South, so the Summer’s here get very hot. Once the weather starts turning a little cooler in the mornings, it starts reminding me of Fall and Halloween. My son loves Halloween and dressing up in costumes (yes, plural since he typically gets one for school and another for Trick-or-Treating.) Whether or not I dress up in a costume, it is nice to get in the spirit by wearing Halloween-themed clothes in the season. I recently realized I didn’t have much for Halloween except for costumes and decided this would be a perfect opportunity to make something special with my Cricut cutting machine and EasyPress 2. I wanted something a little different than your normal black, orange and white, but something that still screamed Halloween. I also wanted something a little blingey, but not too over-the-top. I chose Black Glitter Iron On Vinyl and Orange Easyweed Electric HTV. I absolutely love the way it turned out and I hope you do, too.
I want to make a side comment before we get into the instructions. One of the issues I had when I was getting started was understanding the steps needed to recreate someone else’s piece. Either steps or materials were left out and I was left wondering, “now what?” or scratching my head and looking for another tutorial to follow. I know my tutorials are long, but I hope you feel they are thorough and easy to follow. If you have any questions, please feel free to contact me so I can clear up any confusion. Now that is out of the way, let’s get started.
Supplies Needed
- Shirt or other blank
- HTV or Iron On vinyl. For this project I used:
- Cricut Glitter Iron On Vinyl (Black)
- Siser Easyweed Electric HTV (Orange)
- EasyPress 2 or heat press
- Weeding tool
- Parchment paper or Teflon cover sheet
- Lint Roller
- Scissors
- Cricut Design Space
- Computer or mobile device to use Design Space
Step 1 – Upload your design into Design Space
Using a Cricut image in Design Space
- Open Design Space and Select the “New Project” or “My Projects” and “New”
- Click on “Images” on the left side of the screen
- In the search bar at the top of your screen, type in a search term and press Enter
- Once you find an image you like, click it to add it to the bottom of the screen. When finished, click on the “Insert Images” button
Uploading an svg file from another source
Sometimes you may find a really cute design, font or bundle online. I found this design at DesignBundles.net. After purchasing, you’ll need to download the file onto your computer. This will typically be a zip file that you will need to extract. The process will vary depending on your operating system. This will NOT add it to Design Space. The following steps will show you how to bring the images into Design Space.
- Open Design Space and Select “New Project” or “My Projects” and “New”
- Click on “Upload” on the left side of the screen
- Under Image, click “Upload Image”
- Click “Browse” and then select the .svg file that you previously downloaded to your computer by double-clicking the file name or click the file and click “Open”. Note: The file type will either be .svg OR it will be listed as a Microsoft Edge HTML Document. You can select more than one file to upload.
- Click “Upload” on the Cricut Design Space screen
- Select the image(s) you want to bring into your design and click “Insert Images”. Note: You can add more than one image at a time.
Step 2 – Cut your HTV
Now that you have your design uploaded, you’ll need to determine if the design can be cut from one piece of vinyl or whether you’ll need multiple pieces/colors. You’ll also need to determine what size you’ll need based on the shirt you’ll be using.
If the design is all one color and you’ll be using the same type of vinyl for all of it, then you only have one layer. If you have multiple colors, each color will be a layer.
- If you have one layer click “Select All” from the menu at the top and then click Attach. Attaching the elements will keep each piece in the correct position when you cut out your design.
- If you have more than one layer, pick a layer/color to start with. On the right side of Design Space, hold SHIFT and click on each group and/or element for that color. Click on Attach (lower right corner) of Design Space. Repeat for each color.
Once you attach each layer, you will click on “Make It” (upper right corner of Design Space).
- The left side of the screen will show a thumbnail template of each mat by color. Since you are using HTV (or Iron On), you must Mirror each mat. Click each mat one at a time and press “Mirror” for each one. (Note: You must mirror each one individually. It doesn’t automatically mirror all the mats when you mirror the first one.) Click “Continue”.
- Set Base Material – If you don’t see your material, click on “Browse All Materials”. Use the “All Categories” down arrow, select “Iron On” and click “Done”.
- Put your vinyl on the mat (shiny side facing DOWN) and load the mat onto your Cricut cutting machine by pressing the flashing Up/Down arrow button.
- Once the mat is loaded, press the flashing Cricut “C” to start cutting.
- After your Cricut finishes cutting the material, you can press the flashing Up/Down arrow to unload the mat from the machine. After the last layer, press “Finish” to complete the cutting job.
- To remove the vinyl from your mat, put the vinyl face down on a flat surface and pull the mat away from the vinyl (instead of pulling the vinyl from the mat). Pulling the mat away from the vinyl, usually keeps your vinyl from curling too much.
- Weeding – You can take your weeding tool and use it to pull the excess vinyl off the carrier sheet (the shiny side). You only want the vinyl that is going to be applied to your shirt to remain.
- If you have more layers to cut, repeat steps 2-7 for each layer.
Step 3 – Apply the HTV to your shirt
Cricut has a great heat guide available online that will provide the correct temperatures, time, pressure and type of peel based on your vinyl and the blank you’re using. If you are using another brand of vinyl, most of them will either provide time and temperature settings in their packaging OR you can find them on the company’s website.
- Preheat your EasyPress or heat press to the recommended temperature and time.
- Use your lint roller to remove any dust, hairs or loose fibers from the shirt.
- Use your EasyPress or heat press to preheat the garment for approximately 5 seconds.
- The next steps will depend on whether you need to press one layer or multiple layers.
- SINGLE LAYER: Place the HTV on your shirt with the shiny side/liner facing UP. Cover with parchment paper or a Teflon cover sheet. Press for the recommended time, temperature and pressure.
- Check to see if the material requires a hot, warm or cold peel. Remove (or peel) the liner immediately if the material is a hot peel. For a warm peel, remove the liner after it’s cooled slightly and it’s still warm to the touch. For a cold peel, remove the liner after it’s cooled completely.
- MULTI LAYERS: Place the first layer of HTV on your shirt with the shiny side/liner facing UP. Cover with parchment paper or a Teflon cover sheet. Press at the recommended temperature and pressure for 5 seconds to tack it to the shirt (or blank). Remove the liner based on the peel recommendations and place the second layer on your shirt. Repeat these steps for each additional layer: place vinyl, add cover sheet, press for 5-10 seconds, and peel.
- When peeling the liner, if the vinyl doesn’t release easily after the 5-10 second press, replace the cover sheet and press again for the same amount of time. Repeat until the vinyl releases from the liner.
- Once all layers have been tacked, cover with the parchment paper or Teflon cover sheet and do one final press. This final press will depend on the materials being used. I will typically use the longest time recommended for the vinyl I’m using.
- NOTES: You can tell the vinyl has been pressed enough when you can see the impression of the fibers imprinted in the vinyl. You don’t want to overheat the vinyl or you’ll risk the vinyl shrinking. If you’re concerned, it’s better to err on the side of too little time and then repeating until you get the fiber imprints as opposed to overheating and shrinking the vinyl. It’s also important to use the proper amount of pressure when using your Easy Press.
- SINGLE LAYER: Place the HTV on your shirt with the shiny side/liner facing UP. Cover with parchment paper or a Teflon cover sheet. Press for the recommended time, temperature and pressure.
Summary
I know when I first started using my Cricut, creating something with heat treat vinyl was a scary thought. What if I did it wrong? What if I burned the shirt or the vinyl? It just seemed like a scary proposition to me. All it took was for me to make ONE project with HTV and I was hooked!!! I was amazed at how quickly I could create a shirt and how simple the process actually was. To recap, the steps are:
- Upload your design in Cricut Design Space
- Cut and weed your design
- Apply your vinyl with your Easy Press or heat press
I went from scared to a fan of HTV in a matter of one project. Now, it’s one of my favorites for crafting. In my opinion, weeding HTV is easier than regular adhesive vinyl and the weeding process for HTV can be very satisfying. Whether you want spooky and creepy or magical and sweet, Halloween is a great time of year to explore different materials and styles. I hope you create something frightful, magical or plain old fun. If you have any questions, please feel free to add them in the comments below.


